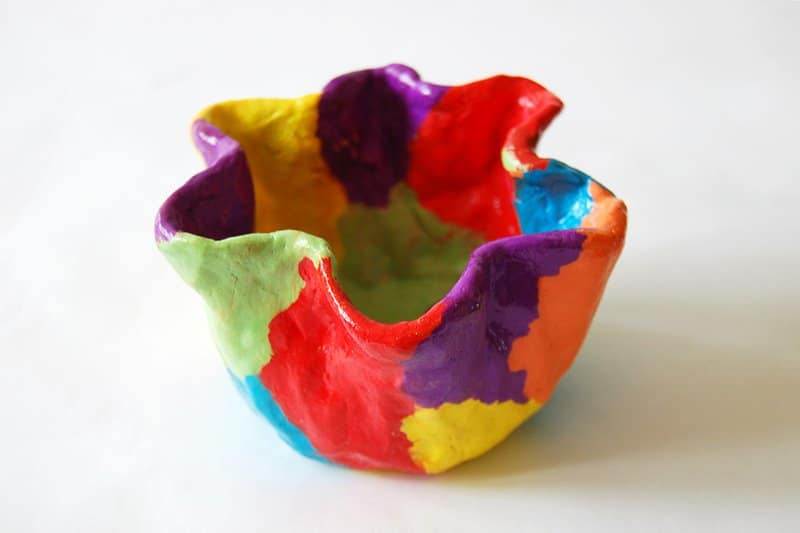
You can use air dry clay to make pots with your hands. Pinch pots are works of art you can make at home by “pinching” clay into useful shapes, allowing them to dry, then sealing them
Materials:
- Air Dry Clay
- Clay Tools
- Cup of Water
- Canvas Drop Cloth (or surface protector)
- Acrylic Paint (optional)
Directions:
Cover your work area with newspaper or a piece of vinyl table cloth or plastic. You’ll need some Air Dry Clay (recipe available here) and any tools you want to use to put patterns onto your creation. You’ll want a cup of water at the table.
To form your pot, start with a piece of clay about the size of the palm of your hand. Roll this into a ball.
Push a finger into the middle of the ball but not all the way through it. You want to leave a “bottom” with no hole in it for the bottom of the pot, so push about ¾ of the way through your ball. You don’t want to make the sides or the bottom of the pot too thin or it might collapse.
To create the opening in the pot, pinch the sides of the pot to thin it and turn the pot to gradually thin the sides evenly all the way back around to where you started. Continue to pinch carefully till the opening is the size you want it.
Once the main shape of the pot has been worked out, smooth the surface of the clay. Add some clay to the sides at the bottom if the pot needs it to stay stable or make a “foot” for it to stand on. To make a foot, roll some clay into a rope shape and make a coil for the pot to sit on.
Before the clay dries, you can decorate it with designs. You can use a fork or toothpick pressed gently into the clay to make designs as long as the clay hasn’t dried too much. You can add animal features to make a fun pot. You can cut the sides and open the sections so they resemble a flower. The sky is the limit!
Let the clay air dry completely and then you can paint it with acrylic paint.


